- Joined
- Aug 29, 2018
- Messages
- 78
- Motherboard
- GA-Z170X-Gaming 5
- CPU
- Intel Core i7 6700K
- Graphics
- AMD Radeon Pro 580
- OS X/macOS
- 10.14.x
- Bootloader
- Clover (UEFI)
- OpenCore (UEFI)
- Mobile Phone
- iOS
This is a quick guide on how to upgrade macOS Sierra or macOS High Sierra directly to macOS Mojave.
The process is pretty simple and straight forward but you need to make sure that there are few things that you check before attempting to update to Mojave:
You can extract the apfs.efi from your current macOS High Sierra by using the following command in the terminal:
The command above will copy the apfs.efi to your desktop which you can easily copy to your EFI folder to the DriversUEFI64 folder.
How to extract the apfs.efi from the installer:
You can also extract the apfs.efi from the Install macOS Mojave.app :
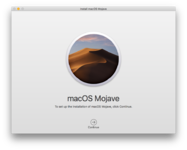
Ok, now if you have everything ready, open up the Install macOS Mojave.app from the applications folder
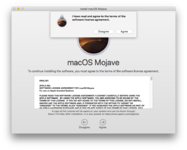
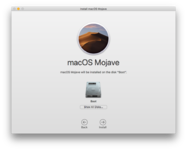
Follow the steps and let the installer run its course and once it’s done the computer will reboot into the next stage. You might notice that the timing is a bit longer than a normal installation but it’s fine, the installer needs to make sure that the system is getting updated and then it will reboot twice until you reach the desktop.
If for whatever reason the installer gets stuck you can simply reboot the computer and it will continue.
Good Luck!
The process is pretty simple and straight forward but you need to make sure that there are few things that you check before attempting to update to Mojave:
- Make sure that you are using a compatible SMBIOS definition which supports macOS Mojave.
- Make sure that you already installed the latest version of the Clover Bootloader.
- Make sure that you have the latest versions of the KEXT files available in /EFI/Clover/kexts/Other
- Make sure that you have already downloaded the Install macOS Mojave.app from App Store and it is available in your Applications folder.
- Make sure you have a back up of your data on the destination drive that you want to upgrade to macOS Mojave
- And last but not least remember that macOS Mojave will convert the format of the disk (either if it’s a conventional HDD or a SSD) it will be converted to APFS by default and you need to have at least one of the following drivers available:
- apfs.efi
- apfsdriverloader.efi
You can extract the apfs.efi from your current macOS High Sierra by using the following command in the terminal:
Code:
cp /usr/standalone/i386/apfs.efi to ~/desktopHow to extract the apfs.efi from the installer:
You can also extract the apfs.efi from the Install macOS Mojave.app :
- Simply right clicking the installer app and the select the “Show Package Contents”
- Then navigate to the following path /Contents/SharedSupport/ an then double click on BaseSystem.dmg to mount it
- Once the package is mounted you can find the apfs.efi under the following path: /usr/standalone/i386/apfs.efi
- Now you need to add the apfs.efi to your EFI partition under the /EFI/Clover/DriversUEFI64 folder.
Ok, now if you have everything ready, open up the Install macOS Mojave.app from the applications folder
Follow the steps and let the installer run its course and once it’s done the computer will reboot into the next stage. You might notice that the timing is a bit longer than a normal installation but it’s fine, the installer needs to make sure that the system is getting updated and then it will reboot twice until you reach the desktop.
If for whatever reason the installer gets stuck you can simply reboot the computer and it will continue.
Good Luck!


